
Often, if you need assistance with a SermonAudio feature, it’s helpful for us to have a screenshot of what you’re working on so that we can see how to help. Here’s a quick guide to capturing a screenshot on your computer.
Taking a screenshot on a Windows PC
The simplest way to take a screenshot on a PC is to press the “Print Screen” button on your keyboard. It is often abbreviated PrtScn and captures an image of your computer screen.
If you’re using a laptop, you may need to press fn, PrtScn since laptops often assign multiple functions to keys.
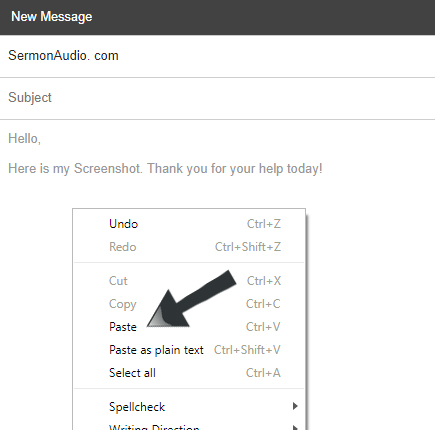
With each of these methods, the final screenshot is saved to your PCs memory. Once in memory, you will be able to paste the image into an email and send it to us. To do this just open a new email and paste the image into the body of the email. To paste the image you can either hold down the CTRL and hit V button on your keyboard or LEFT CLICK with your mouse in the body of the email and select PASTE from the drop-down menu.
That’s it, now all you need to do is add any text to the body of the email, put our email address in the TO box and hit send.
Taking a Screenshot on a Mac
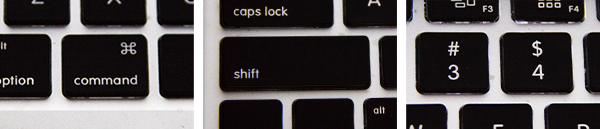
On a Mac, there are two ways that you can take a screenshot. The first is to press shift, command, 3. This will take a screenshot of your entire screen.
The other way to take a screenshot on Mac is to press shift, command, 4. This replaces your cursor with a crosshairs icon, and then you can click and drag to take a screenshot of one section of your screen.
The resulting screenshot is saved as a .png file on your computer’s desktop. To send us the screenshot, just open a new email and attach the image. You can either drag the screenshot into the body of the email or click the paperclip icon and select the screenshot file to add it.
Now just fill in the text of your email, put our email address in, and send it along!