This is a simple step by step tutorial on how to record and upload your sermons using an iPhone and iOS Voice Memos app.
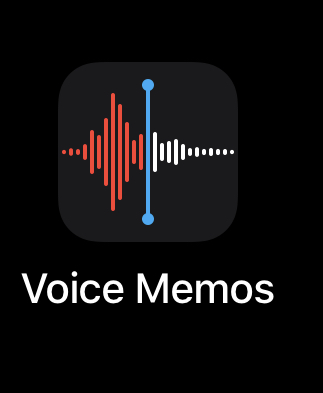
First, locate the Voice Memos app on your device it should come preinstalled. it looks like this.
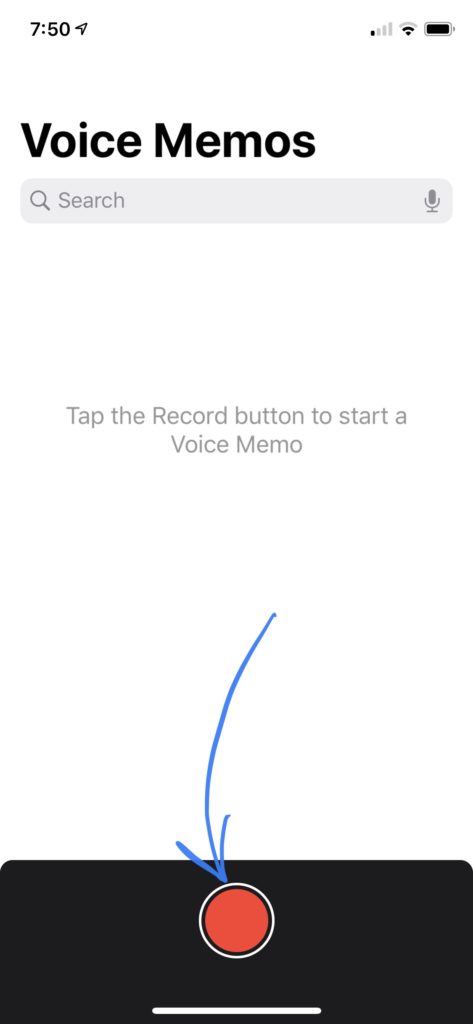
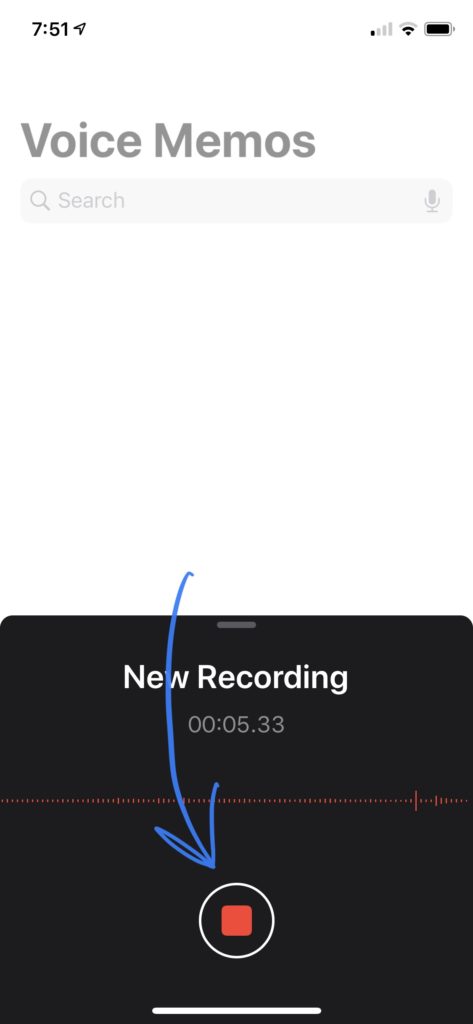
To record, simply open the app and press the record button here.
When you’re finished recording press the stop button.
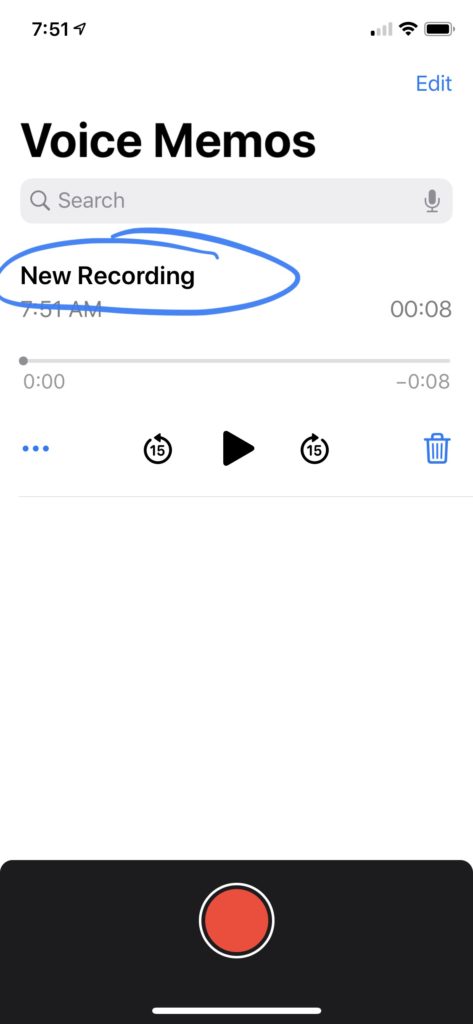
It is a good idea at this point to name your sermon. This will make finding the right audio file for upload much faster and easier. To do so, just touch the title and enter your title.
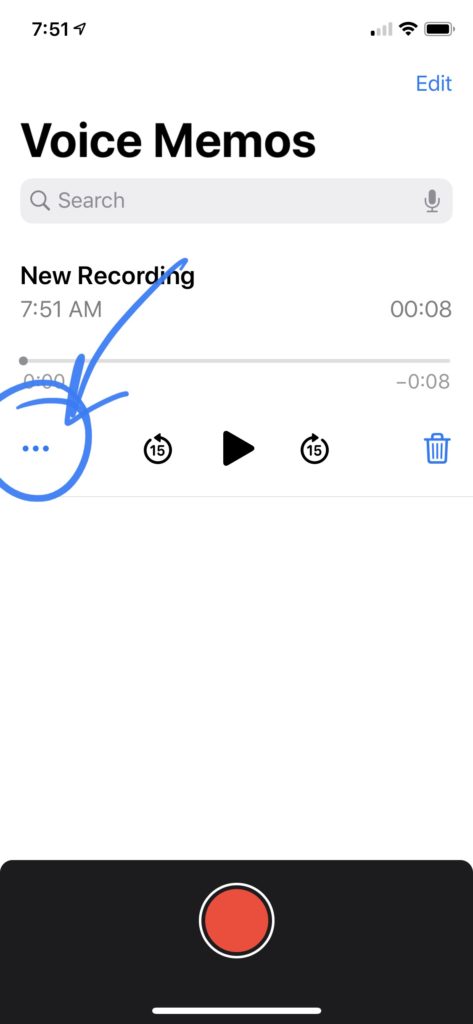
Next, we will save your file locally on your device. To do this touch the . . . icon on the screen just to the left of the player controls.
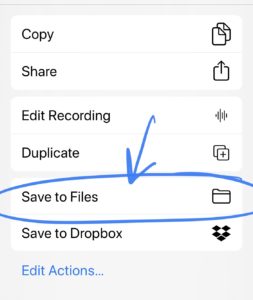
On the next screen you will select “Save to Files.”
This point you will need to choose where you wish to save your sermon so that you can access it for upload later.
It is probably a good idea to create a new folder to keep things organized but you can save it wherever you want. Just remember where you placed the file so that you can find it when you upload the sermon to SermonAudio later.
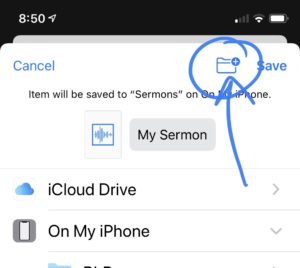
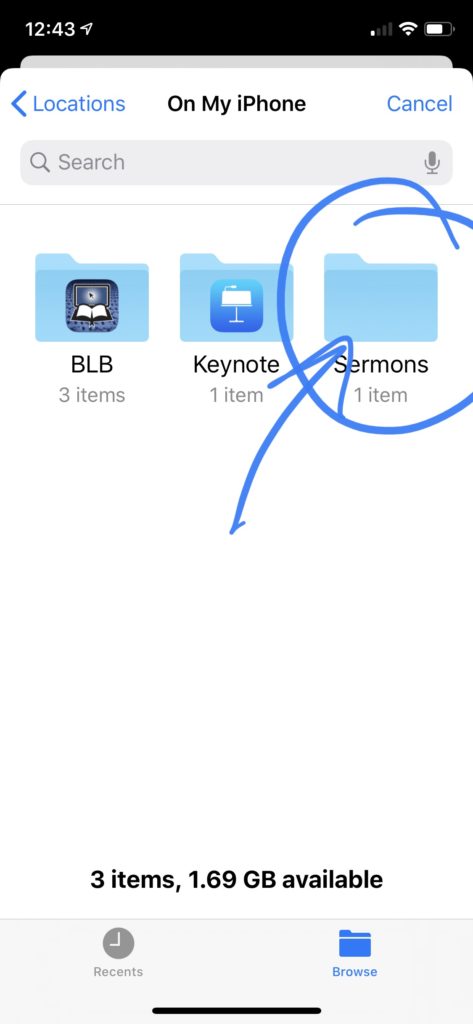
To create a new folder touch the folder icon in the upper right corner of the screen.
(Please note, you only need to do this once. If you have already done this in the past you do not need to create a new folder each time you save a new sermon and this step can be skipped if the folder already exists.)
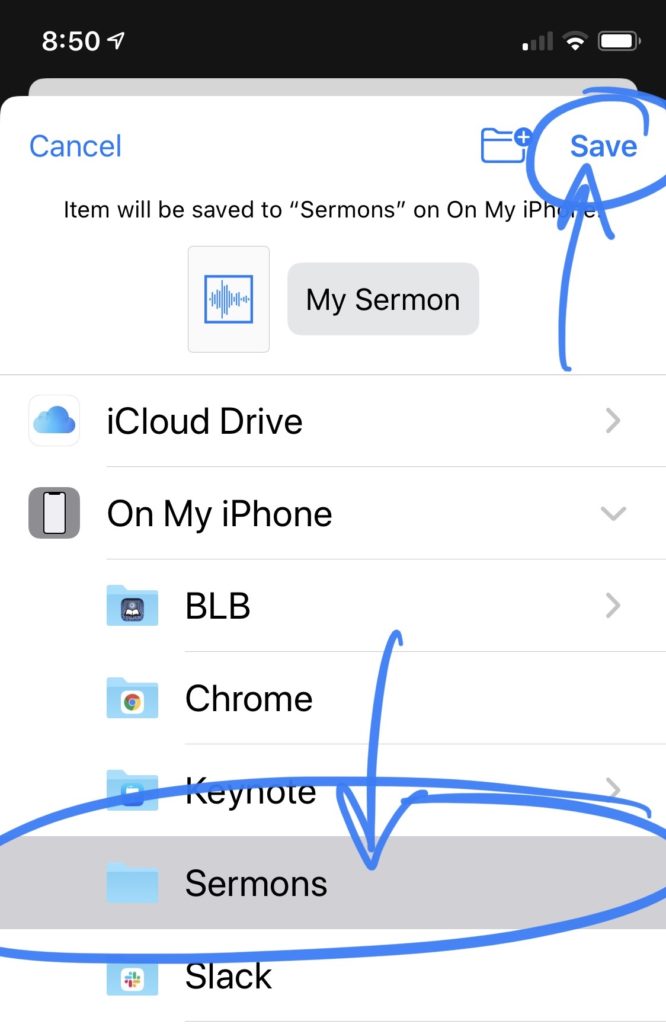
Next enter the name of your folder. For this example, we will call it “Sermons.” Press “Done” in upper right corner when finished.
You will now see a folder listed in the local files section and it should be highlighted. Next, you will touch “Save” to save your file to the highlighted folder.
That’s it. Your sermon is now ready for upload.
To create a new sermon record on SermonAudio and upload your audio, login to the SermonAudio Broadcaster Dashboard in your browser on your mobile device.
You should be able to use any browser but Safari comes preinstalled on iOS devices so we will use that one for this example. Find the icon that looks like this to start your browser.
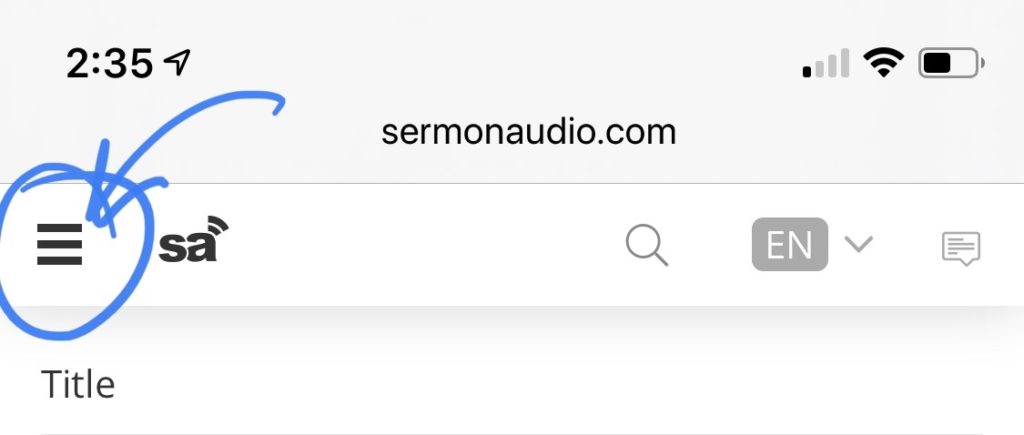
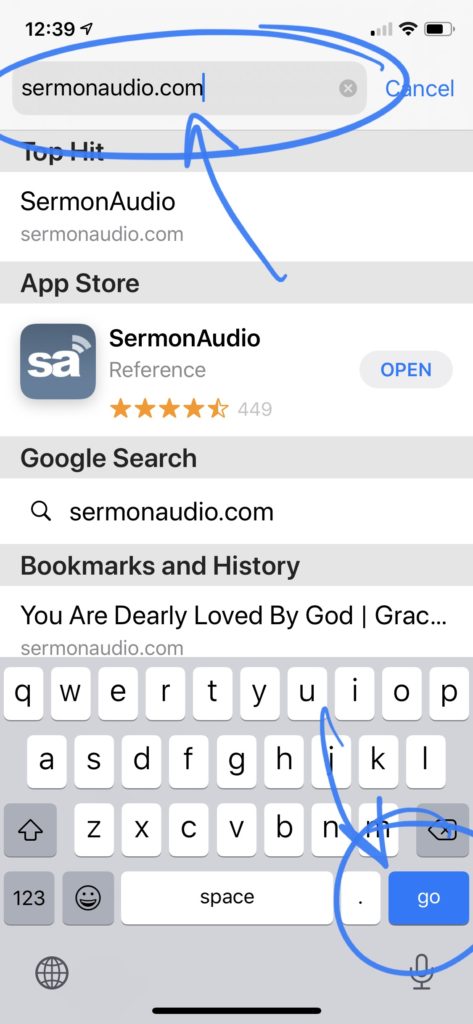
Once the browser is open touch the address bar at the top and enter “sermonaudio.com” in the address box and then press go at the bottom.
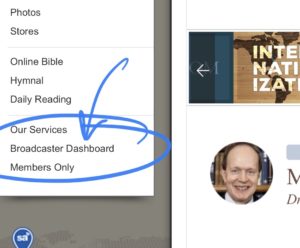
You will then be taken to the main page of the sermon audio website where you can find the link to the Broadcaster Dashboard.

You may have to zoom in in order to touch the link properly on your device.
You will need to login with your member ID and password. Once logged in you will be taken to the broadcaster dashboard.
From here you can edit, delete and create new sermons. You can see more options by touching the horizontal elipisis in the upper right corner of the screen.
To create the new sermon simply touch the create new sermon button at the top of the dashboard.
The first step on the sermon creation page will be to upload your media.
If you need to trim your audio file, you can do this using the advanced option for upload by selecting advanced before you begin your upload pictured above. (If you do not need to trim you can leave the default set to quick. And skip the section below about trimming your audio.)
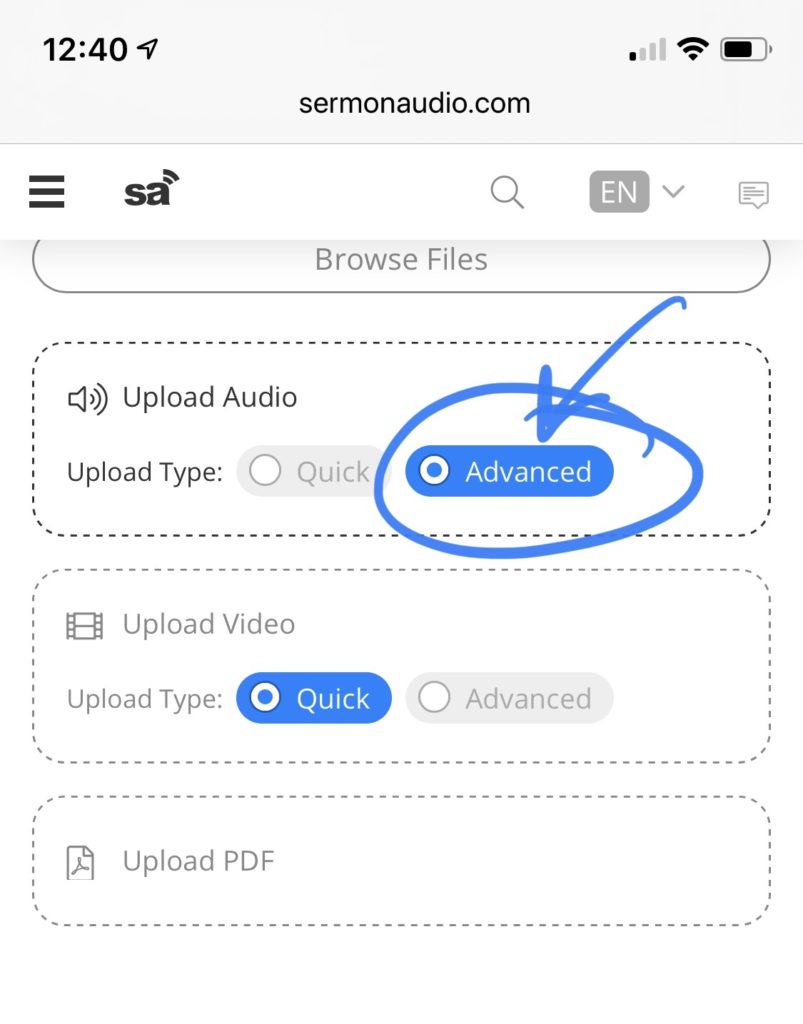
To begin the upload, tap anywhere in the dotted box for audio or on the browse files button at the top.
Next, select the browse option to locate your sermon on your device.
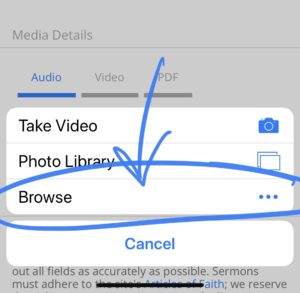
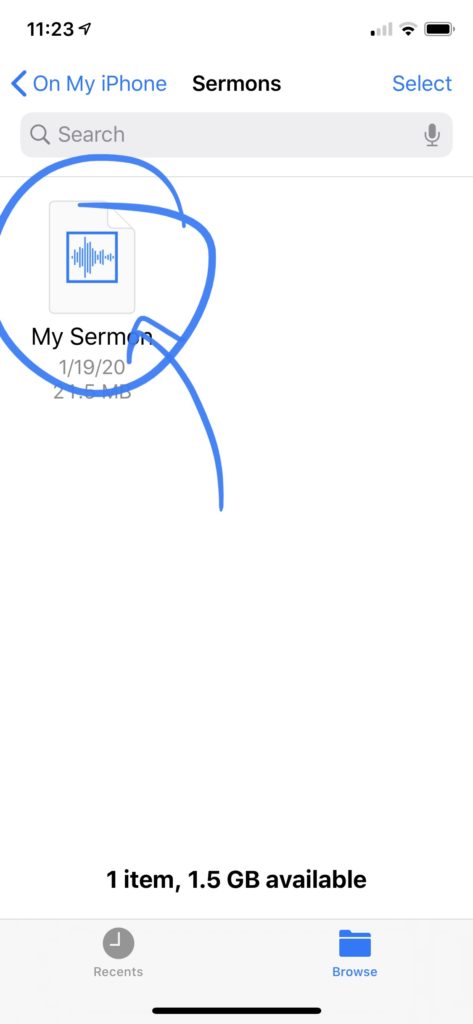
You will need to navigate to the file you created on your device. If you are not sure where you are touch the “Browse” button in the lower left to take you back to the top level of the file system.
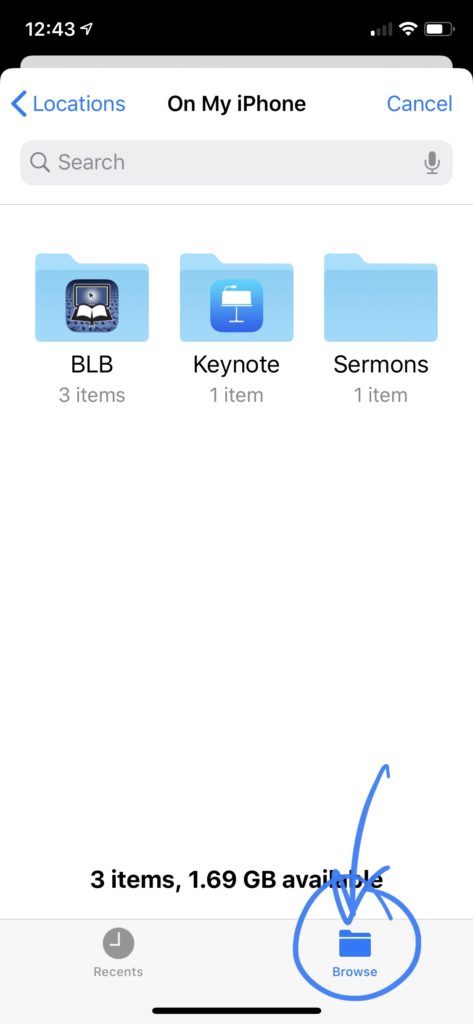
From there select on my phone (or iPad if you are on an iPad) to navigate to the files that have been saved on your device.
Then select the folder we created earlier or navigate to the folder where you saved your file.
Next, tap on the file and your upload will begin. If you did not need to trim the audio and selected “quick upload” you can skip the next step on trimming the audio and move on to the section on encoding.
If you selected the advanced upload option the upload section will expand to enable you to set trim values for your audio. This is helpful to remove announcements, singing, or dead space at the beginning or ending of a file.
You can set the start and stop time to trim by entering it in the beginning and ending boxes or by dragging the beginning and ending markers on the player.
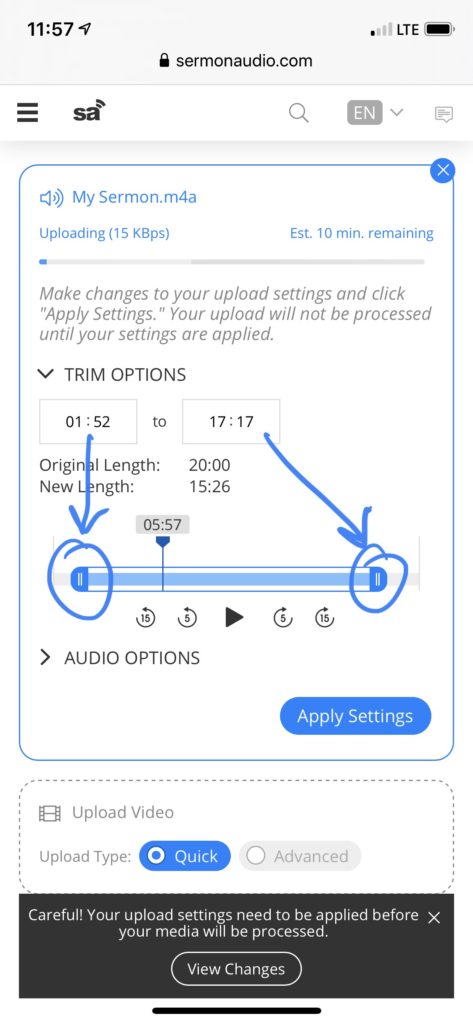
The play head can be used to play the file to help find the exact spot where you wish to begin and end. Using this in conjunction with the forward and backward buttons can help you pinpoint exactly where you want to apply the trim.
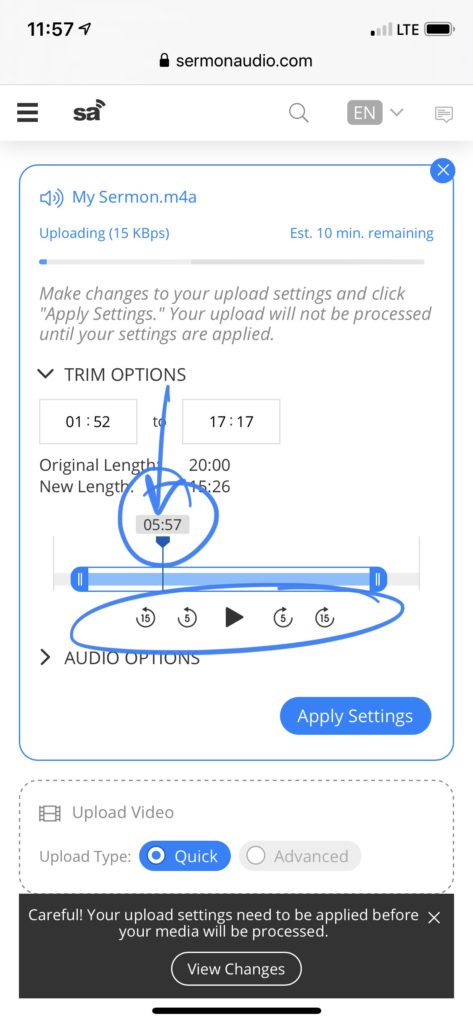
When you have the begin and time just right touch “Apply Settings” and the changes will be Applied during encoding on the server.
It is very important not to close the browser until the upload is finished. If you close it before the upload is complete the upload will be cancelled.
Once the upload has started you can scroll down the page and enter the sermon details.
The only two required fields are the Sermon Title and Speaker. We Strongly recommend that you fill out as much of the sermon detail as possible as it all will help with discovery and organization on the site and in the apps.
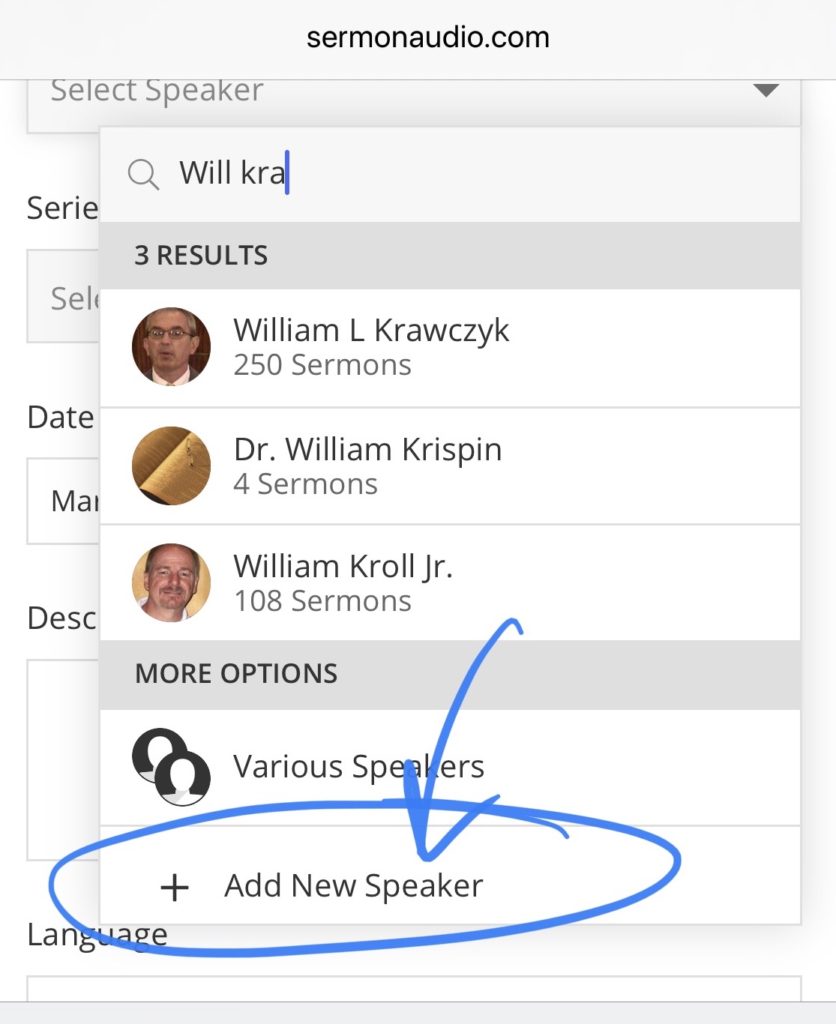
When posting a sermon by a New Speaker it is always a good idea to do a quick search using the first few letters of the speakers given name and surname (first and last name) to see if they already exist on the site elsewhere. If you find them simply select the name to add it to the sermon.
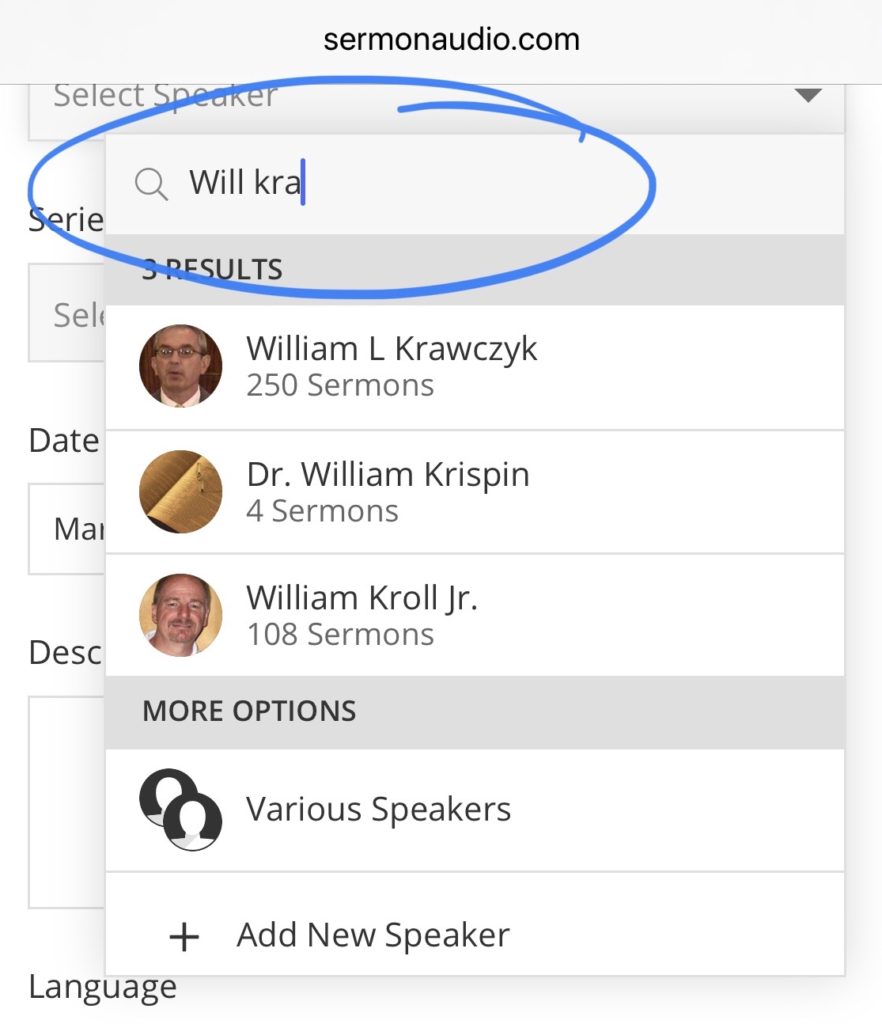
If you do not find them touch the “Add New Speaker” entry at the bottom to add them.
The rest of the data in this section should be filled in as much as you can. The Bible references are especially important as many people look for sermons on a particular text when searching the site.
In the next section you will have the option to auto post this sermon to social media if you have linked your accounts. For more on that see our tutorial on Publish Everywhere.
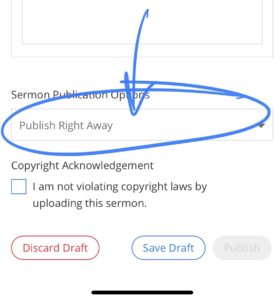
And lastly you will either save a draft for later publication, publish the sermon right away or schedule the sermon to be published at a future time.
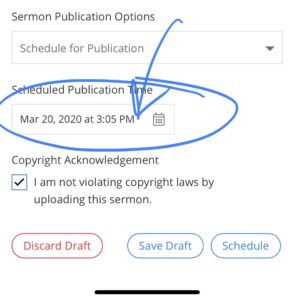
Unpublished sermons are not available to the public until they are published. If you wish to just save the sermon to work on it later you can just touch the “Save Draft” button. To schedule the publication date for the future touch the publications menu and select schedule for publication.
Once selected the date and time picker will appear where you can set the time of publication.
Once you have set your publication options be sure to check the copyright box and you will then be ready to publish or schedule for publication at a future date.
Touching the publish or schedule button completes the process. And your sermon will go live on the site and in all the embeds and apps as soon as the processing is done and the scheduled date has arrived.
Note: you do not need to wait for the processing or uploading to finish before you publish the sermon but DO NOT close the browser before the upload is done. The processing section near the top is a peek into what is happening with your file on the server but that will continue even after you have published and closed the window. Encoding does not have to finish before you close the window but uploading does.
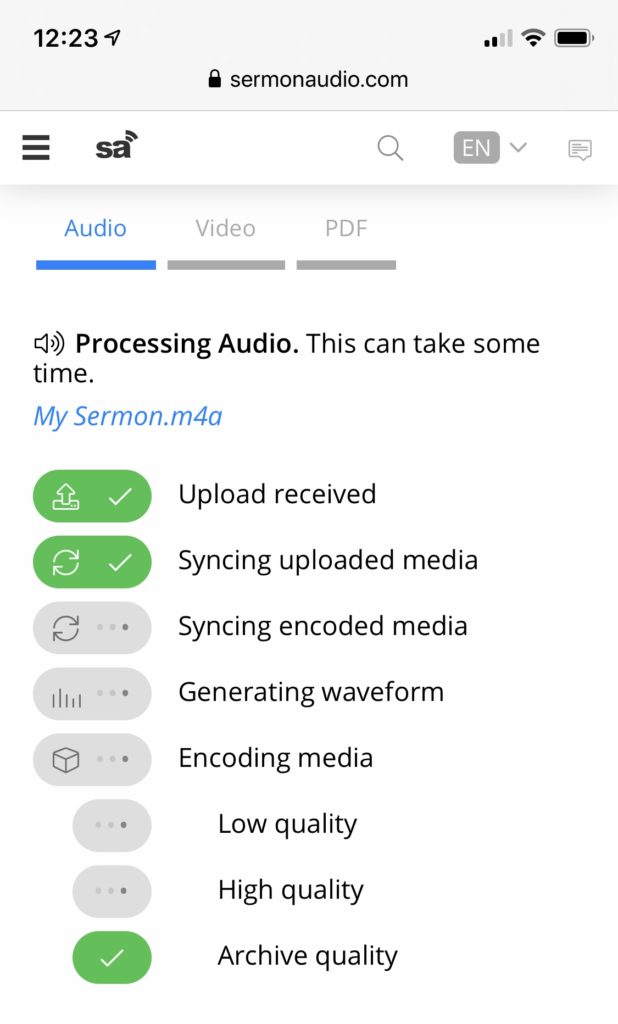
If you go ahead and publish the sermon with the “Publish Right Away” option and you do so before the encoding is complete, the sermon will be created on the site without the media and once the encoding process finishes it will appear on the sermon page. Again, you do not need to wait for this step, you can publish and close your browser as long as the upload is done and the processing has begun.
Once you have published the sermon, you will be presented a link to the newly created sermon page on the site.
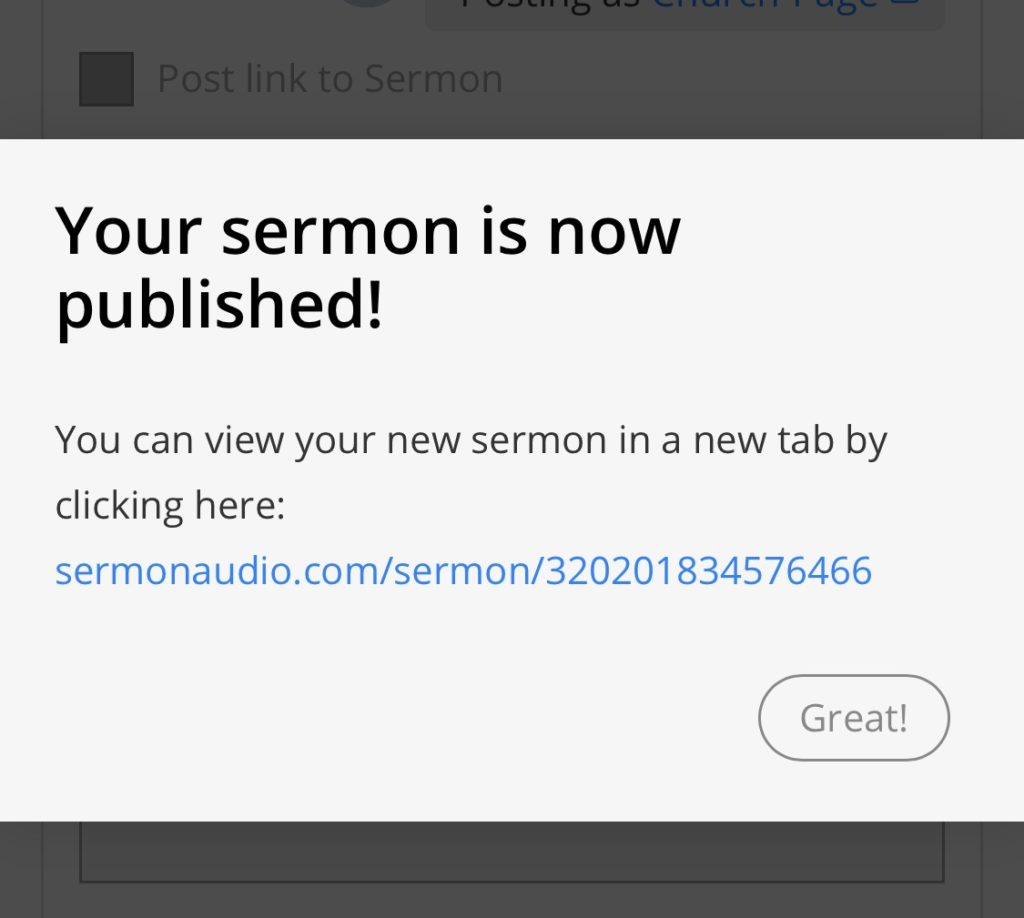
That’s it you just published a sermon.
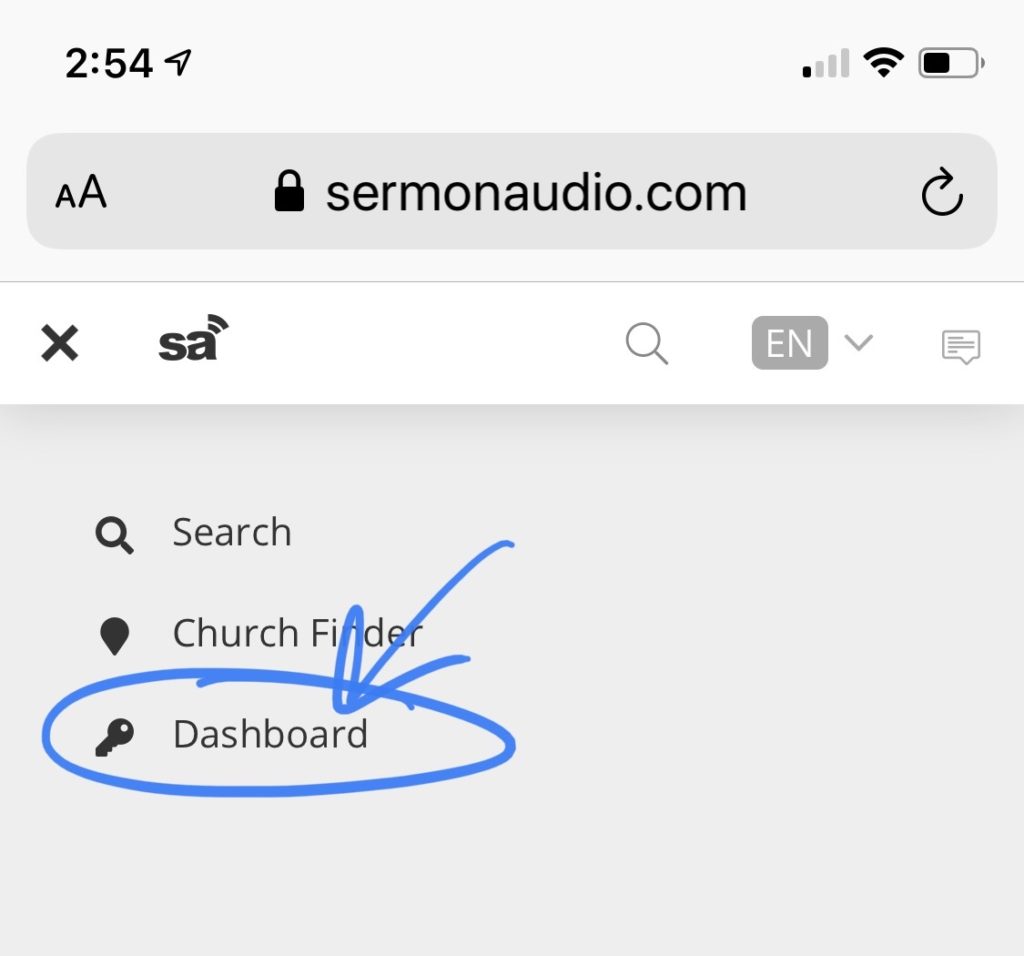
You can return to the Dashboard by tapping the hamburger menu in the upper left corner and selecting the Dashboard option from the menu.